When Karen noticed her tomato plants wilting in the midday heat while the sprinkler system left the paths soggy, she realized her watering routine was costing time and plants. She wanted steadier moisture at the roots without running the hose for half an hour each morning. For homeowners like Karen who juggle work, kids, and a busy yard, the right irrigation setup makes all the difference.
Why drip irrigation is often the best fit for vegetable beds
Problem: Overhead sprinklers wet leaves, encourage disease, and waste water on pathways. For a 10-by-20-foot vegetable bed, a typical sprinkler run can use 200–400 gallons per session while delivering uneven moisture.
Solution: Drip irrigation places water right at the root zone in small, steady amounts. That cuts evaporation and run-off, and keeps foliage dry — which lowers fungal disease risk for crops such as tomatoes and peppers. According to the U.S. Environmental Protection Agency, smart irrigation and efficient delivery methods can save thousands of gallons annually; smart controllers alone have been shown to reduce water use by up to 50% in some settings. Pairing drip delivery with an appropriate controller magnifies those savings.
Example: A 4x10 raised bed planted with lettuce, carrots, and basil can be kept evenly moist with a 1/4 gallon-per-hour (GPH) emitter every 12 inches. Running the system for 30–45 minutes twice a week in summer gives consistent moisture without turning the soil into a swamp.
Match the drip components to your bed
- Raised beds and rows: use 1/4" dripline or soaker-style tape with integrated emitters spaced 6–12".
- Container clusters: use a small manifold with micro-tubing and 1 GPH adjustable drippers to supply each pot.
- Long single rows: use 1/2" mainline with 1/4" laterals and 0.5–1 GPH emitters placed at each plant.
Tip: Choose adjustable emitters for mixed plantings so heavier feeders (like squash) get more water than light consumers (like herbs).
Designing a drip layout that matches your garden's challenges
Problem: Many gardeners install a single line and expect it to work everywhere, but different crops and bed widths need different delivery patterns.
Solution: Sketch your garden, note plant spacing, and plan laterals so each plant gets water where its roots are. For a 3-foot-wide bed, run two parallel driplines 8–12 inches from the bed center. For staggered plantings, offset emitters so each root ball has a nearby source.
Example: Ben has a mixed 30-foot bed with tomatoes (24" spacing), beans (6" spacing), and peppers (18" spacing). He runs a 1/2" supply line with 1/4" feeders: 2 GPH drippers for tomatoes, 1 GPH for peppers, and a dripline with 12" emitter spacing through the bean section. The result: tomatoes get deep, less frequent water; beans get lighter, more frequent pulses.
Bed WidthRecommended LayoutEmitter Spacing2–3 ftSingle or double parallel dripline6–12"4–6 ftTwo lines spaced ~12" apart6–12"Raised long rowsMainline + 1/4" laterals per planting row12–24"
Concrete figure: A well-planned drip system can reduce irrigation water use for vegetable beds by 30–60% compared to conventional sprinklers, according to agricultural extension studies at many land-grant universities.
Scheduling and run-times: how much and how often
Problem: Gardeners either run drip too long (wasting water, causing root rot) or too short (stress and reduced yields). Proper scheduling depends on soil type, weather, and plant stage.
Solution: Use short, frequent cycles for sandy soils and longer, less frequent cycles for clay. Seedlings and transplants need gentle, frequent moisture; established vegetables do better with deeper, less frequent watering that encourages strong root systems.
Basic starting schedule (adjust to conditions)
- Sandy soil: 10–20 minutes per zone every other day in summer.
- Loam soil: 20–40 minutes per zone every 2–3 days.
- Clay soil: 30–50 minutes per zone every 3–5 days.
Example: In a loam bed with 1 GPH emitters and plants spaced 12" apart, two 30-minute runs per week in early summer often provide adequate moisture. Increase frequency during heat waves and reduce it after heavy rain.
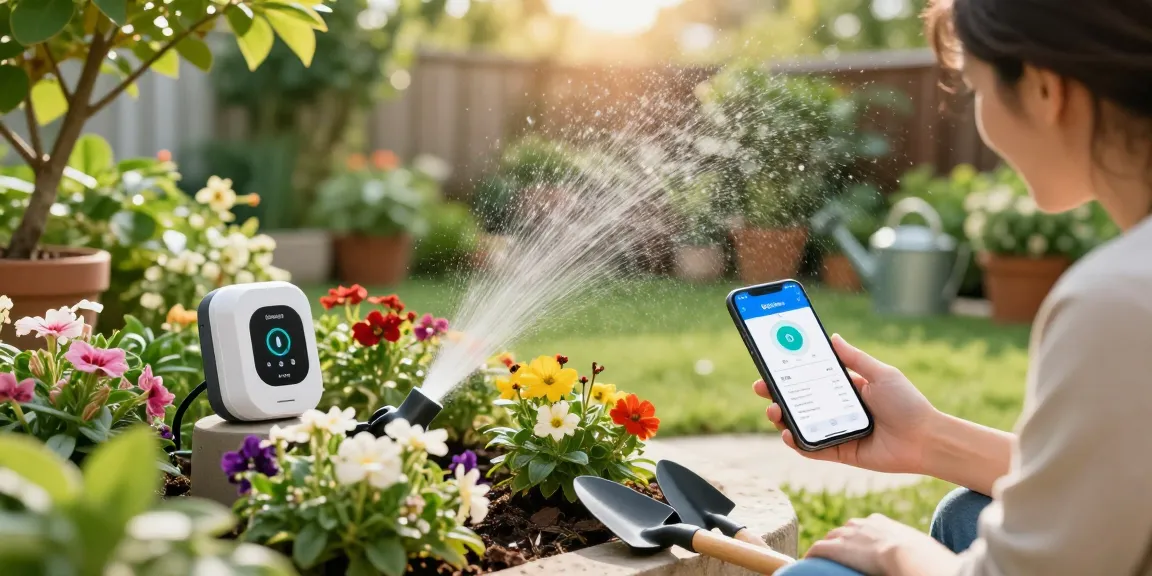
Using a WiFi sprinkler timer such as the RainPoint model lets you set multiple short cycles per day (soaker-style morning + late afternoon refresh) and adjust remotely if a storm is coming. That flexibility prevents overwatering and saves trips to the hose.
Installation basics, maintenance, and common fixes
Problem: New drip systems can clog, get chewed by critters, or shift from sun exposure. Those issues often make gardeners abandon drip as “unreliable.”
Solution: A few simple installation and maintenance steps keep a system working for years. Install a pressure regulator and filter at the tap, bury mainlines shallowly for protection, and strap lines down with stakes. Flush the system after installation and then seasonally. Check emitters monthly during the growing season.
Example: After installing her drip kit, Maria placed a 50-mesh filter before the supply, added a 25 psi regulator, and capped unused line ends with barbed plugs. When she found one emitter weak, she removed it, backflushed the line, and replaced the emitter in under five minutes.
- Always use a filter (mesh size 50–200 depending on water quality).
- Install a pressure regulator if line pressure exceeds emitter rating (usually 15–30 psi).
- Winterize by draining lines or blowing out with low-pressure air in cold climates.
Practical figure: Small particulate and mineral buildup account for most clogging; routine filter checks and annual flushing usually prevent more than 90% of emitter failures.
For gardeners who want a ready-made solution, a complete drip kit sized for vegetable beds speeds installation. If you'd like a how-to specifically aimed at raised beds and row crops, check this practical guide to water your vegetable garden efficiently with drip irrigation.
Why choose the right setup — and how RainPoint helps match it
Problem: One-size-fits-all products lead to underperforming systems or wasted money. Folks often buy a cheap timer or a mismatched kit and then blame drip for underperforming crops.
Solution: Match the technology to the problem: small yards and container gardens benefit from simple portable systems; large plots need zoned supplies and smart controllers; vegetable gardens get the precision of drip. A WiFi timer from RainPoint can handle staggered start times, multiple short cycles, and remote adjustments — which is ideal for vegetable beds that need different runtimes than lawns.
Example: After comparing options, Elliot paired his raised beds with a RainPoint WiFi timer and a modular drip kit. He now runs two short cycles each morning for seedlings and one deeper cycle midweek for mature beds. He checks schedules from his phone when he’s out of town and has seen less disease and better yields.
Installing the right system for a specific watering challenge saves time and reduces water use while producing healthier plants. With a few basic components — emitter-rated dripline, a filter, pressure regulator, and an occasional check — most homeowners can set up an efficient, reliable vegetable irrigation system that keeps their garden productive season after season.